Drawing a football helmet is easier than you think. With a few simple steps, you can create a realistic helmet.
Football helmets protect players on the field. Drawing one can be a fun way to appreciate the sport. In this guide, you’ll learn how to draw a football helmet step-by-step. This tutorial is perfect for beginners and art enthusiasts. You’ll need basic drawing tools like paper, pencil, and an eraser.
By the end, you’ll have a cool football helmet sketch. Let’s get started and bring your drawing to life!

Credit: in.pinterest.com
Materials Needed
Creating a detailed drawing of a football helmet requires some basic materials. With the right supplies, you can bring your artwork to life. This section will guide you on the necessary materials.
Drawing Supplies
To start, gather these essential drawing supplies:
- Pencils: A set of pencils with different hardness levels.
- Eraser: A good quality eraser for corrections.
- Paper: Smooth drawing paper works best.
- Ruler: For straight lines and measurements.
- Sharpener: Keep your pencils sharp for fine details.
Optional Tools
These optional tools can enhance your drawing experience:
- Colored Pencils: Add color to your football helmet.
- Markers: Use for bold outlines and vibrant colors.
- Blending Stumps: Smooth out shading and create gradients.
- Compass: Draw perfect circles for the helmet’s curves.
- Reference Image: Use a photo of a football helmet as a guide.
Basic Helmet Shape
Drawing a football helmet can be fun. Start with the basic helmet shape. This part is crucial. A good foundation makes the rest easier. Let’s break it down into simple steps.
Outline The Helmet
First, draw a large oval. This will be the main body of the helmet. Make sure it is wide enough to cover a player’s head. Next, draw a horizontal line near the top. This line will guide the helmet’s shape.
Now, add a smaller circle on the front-left side of the oval. This circle represents the face mask area. Connect this circle to the oval with smooth, curved lines. These lines form the helmet’s front edge.
Refine The Shape
Refining the shape is key. Start by smoothing out the edges. Make the curves more natural. The helmet should look rounded but sturdy. Erase any unnecessary lines.
Next, add the ear hole on the side. Draw a small oval in the middle of the helmet’s side. Ensure it is proportionate. This small detail adds realism to your drawing.
| Step | Description |
|---|---|
| 1 | Draw a large oval for the helmet’s main body. |
| 2 | Draw a horizontal line near the top of the oval. |
| 3 | Add a smaller circle on the front-left side for the face mask area. |
| 4 | Connect the circle to the oval with smooth, curved lines. |
| 5 | Smooth out the edges and erase unnecessary lines. |
| 6 | Add a small oval for the ear hole on the helmet’s side. |
Now, you have the basic helmet shape. These steps are simple yet effective. Practice these steps to get comfortable. The more you practice, the better you will get.
Adding Faceguard
Adding the faceguard to your football helmet drawing can be a fun and rewarding step. It’s where the helmet starts to look like the real deal. In this section, we’ll break down the process into two main steps: sketching the faceguard and detailing the grill. Let’s dive in!
Sketch The Faceguard
Start by drawing a simple, curved line across the front of the helmet. This line should follow the curve of the helmet’s front, mimicking its shape. This will be the base of your faceguard.
Next, add a vertical line on each side of the curved line. These lines should extend from the helmet’s bottom edge, meeting the ends of the curved line. Your faceguard should now look like a ‘U’ shape.
To create the faceguard’s bars, draw two horizontal lines inside the ‘U’ shape. Space these lines evenly. They should follow the curve of the helmet. These lines represent the bars that protect the player’s face.
Detail The Grill
Now, it’s time to add details to the grill. Start by thickening the lines you drew for the faceguard. This will make them look more like sturdy bars.
Next, add vertical bars to your faceguard. Draw at least two vertical lines inside the ‘U’ shape. These lines should intersect the horizontal bars. Space them evenly to create a grid-like pattern.
To make your drawing more realistic, add small circles or rectangles at the intersections of the bars. These represent the joints that hold the faceguard together.
Finally, add some shading and highlights to give the faceguard depth. Shade the areas where the bars meet and where they curve. This will make your faceguard look three-dimensional.
| Step | Action |
|---|---|
| 1 | Draw a curved line for the base |
| 2 | Add vertical lines on each side |
| 3 | Draw horizontal bars inside the ‘U’ |
| 4 | Thicken the lines for sturdiness |
| 5 | Add vertical bars for the grill |
| 6 | Add joints at intersections |
| 7 | Shade and highlight for depth |
Follow these steps to add a realistic faceguard to your football helmet drawing. Your helmet will now look much more complete and authentic!
Drawing The Padding
Drawing a football helmet can be fun and rewarding. To make it look realistic, you need to focus on the padding inside the helmet. This section will guide you through drawing both the inner and side padding of a football helmet.
Inner Padding
The inner padding is crucial for the safety and comfort of players. Start by drawing the outline of the helmet. Then, create a smaller, oval shape inside it. This will be the base of the inner padding.
Next, add small, curved lines within the oval. These lines should mimic the natural curves of the head. Make sure to space them evenly. This will give the padding a realistic look. Finally, shade these lines lightly to add depth.
Side Padding
The side padding protects the sides of the head. Begin by drawing horizontal lines from the inner padding to the helmet’s side. These lines should follow the curvature of the helmet.
Then, draw vertical lines connecting these horizontal lines. This will create a grid-like pattern. Finally, add a few diagonal lines for extra detail. Lightly shade these areas to add dimension.
By focusing on these details, your football helmet drawing will look more realistic and professional.
Helmet Details
Drawing a football helmet is exciting. Adding helmet details brings it to life. These details give your drawing depth and realism. Let’s focus on two key elements: air vents and the chin strap.
Air Vents
Air vents are small but crucial. They help players stay cool. To draw them:
- Sketch small, oval shapes on the helmet’s top and sides.
- Add a few on the back as well.
- Make sure they are evenly spaced.
- Shade inside the ovals for depth.
These small shapes might seem simple. Yet, they add authenticity to your drawing.
Chin Strap
The chin strap is essential. It keeps the helmet secure. Here’s how to draw it:
- Start by drawing two thin lines from the helmet’s sides.
- Connect these lines under the chin area.
- Add small, rectangular clips where the strap meets the helmet.
- Draw the buckle in the middle of the strap.
For extra detail, add tiny stitches along the strap. This will make your drawing look more realistic.
Adding Team Logo
Adding a team logo to your football helmet drawing can make it stand out. This step personalizes your artwork and shows your team spirit. Follow these simple steps to place and draw the logo perfectly.
Design Placement
First, decide where to place the team logo on the helmet. Most logos are on the side of the helmet. Look at real helmets for inspiration. Choose a spot that is visible and symmetrical.
Use a pencil to lightly mark the spot. This helps ensure the logo is centered. Check the placement by looking at the helmet from different angles. Adjust if needed. Make sure the logo will fit well within the marked area.
Drawing The Logo
Start by sketching the basic shapes of the logo. Use light lines to correct mistakes easily. Focus on the main parts of the logo first. Break it down into simple shapes, like circles and lines.
Once the basic shapes are in place, add details. Look at the logo closely. Notice small elements like lines, stars, or letters. Add these details carefully to match the real logo. Take your time with this step to make the logo accurate.
After finishing the drawing, go over the lines with a darker pencil or marker. Erase any unnecessary pencil marks. Your team logo is now complete and ready to show off. Enjoy the finished look of your football helmet with its new logo!
Shading Techniques
Shading brings depth and realism to your football helmet drawing. By understanding basic shading techniques, you can make your helmet look three-dimensional and lifelike. Focusing on light sources and adding shadows will help you achieve this effect.
Light Source
Identify where the light is coming from. This will determine where the highlights and shadows fall on your football helmet. Imagine a lamp shining on the helmet. The area closest to the light will be the brightest.
Draw lighter lines or leave white spaces where the light hits directly. This creates highlights on the helmet. It gives the illusion of a reflective surface, adding depth and realism.
Adding Shadows
Shadows create contrast and define the shape of the helmet. Start by shading areas farthest from the light source. These areas will be the darkest.
Use a pencil to create soft, gradual transitions from light to dark. This technique is called gradient shading. It helps to blend the shadows naturally.
Pay attention to the curves and contours of the helmet. Shadows will be more intense in crevices and indents. This detail will make your drawing more realistic and engaging.

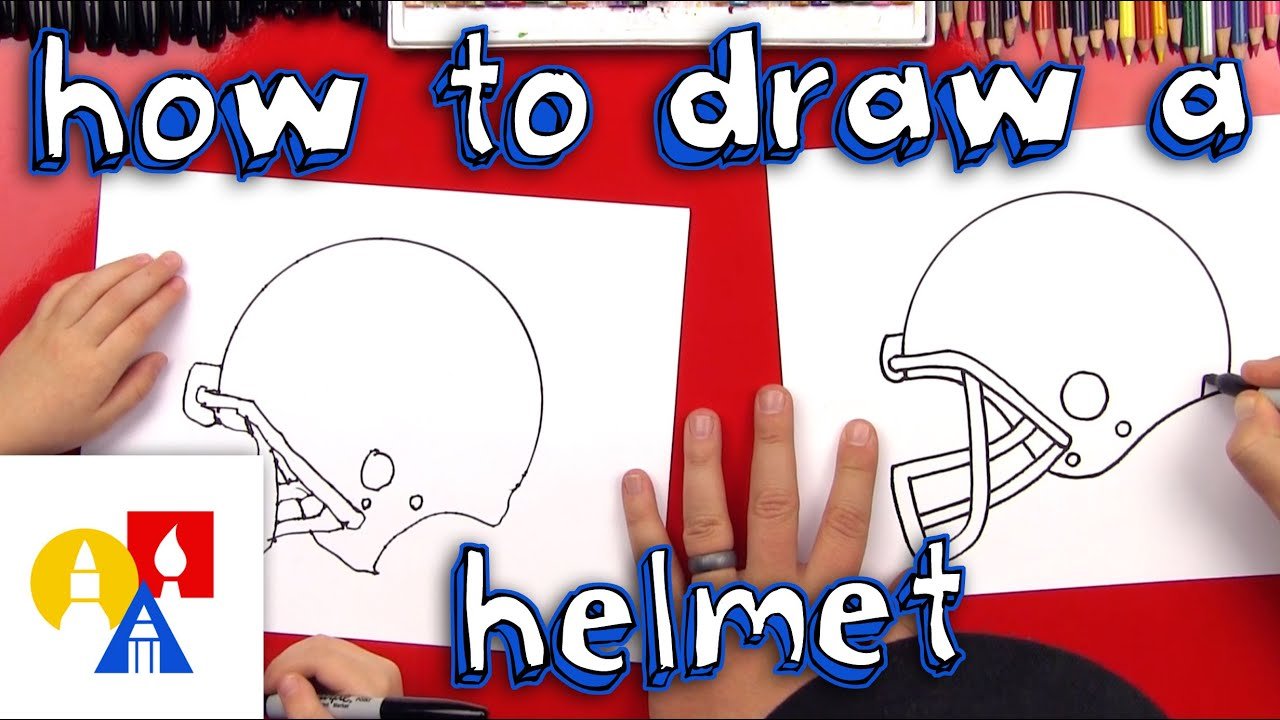
Credit: www.youtube.com
Final Touches
Adding the final touches to your football helmet drawing can make a big difference. These steps will ensure that your artwork looks polished and complete. Let’s go through some key tasks under Final Touches.
Clean Up Lines
Start by cleaning up any rough or extra lines. Use an eraser to gently remove any stray marks. This will make your drawing look crisp and clear.
Check for any overlapping lines or areas where the lines are too thick. Thin them out to maintain uniformity. This helps in making the helmet look more realistic.
Review And Adjust
Now, it’s time to review your drawing. Look at your football helmet from different angles. This helps in spotting any minor errors or areas that need improvement.
Compare your drawing with a reference image. Adjust the shapes and proportions if needed. This ensures accuracy and enhances the overall appearance.
Below are some points to consider while reviewing:
- Proportions: Ensure the helmet looks balanced and symmetrical.
- Details: Add or refine small details like the logo or face mask.
- Shading: Check if any areas need more shading to create depth.
Once you are satisfied with these adjustments, your football helmet drawing is complete. Enjoy the process and take your time to make it perfect.
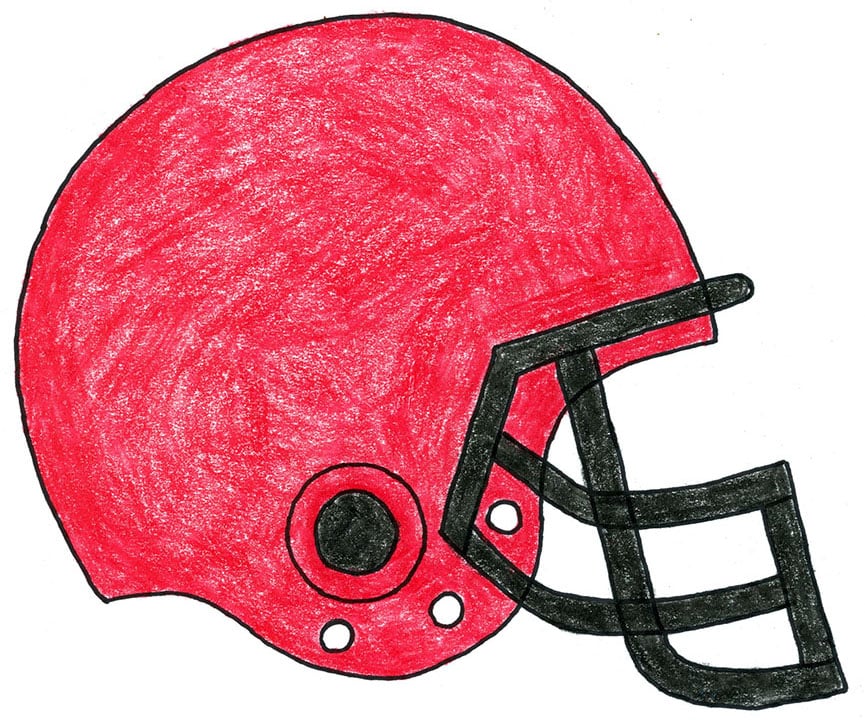
Credit: artprojectsforkids.org
Frequently Asked Questions
How To Start Drawing A Football Helmet?
Begin by sketching a basic oval shape. This represents the helmet’s main structure. Then, add the face mask and other details.
What Materials Are Needed To Draw A Helmet?
You’ll need a pencil, eraser, paper, and colored pencils. These materials help you create a detailed and colorful drawing.
How To Draw The Face Mask Of The Helmet?
Draw parallel lines extending from the helmet’s sides. Connect these lines with curved lines to form the face mask.
How To Add Realistic Details To The Helmet?
Use shading to add depth. Draw small details like the helmet’s logo, vents, and padding for realism.
Conclusion
Drawing a football helmet can be fun and rewarding. Follow the steps outlined above. Practice makes perfect, so keep trying. Soon, you’ll create amazing helmet drawings. Share your artwork with friends and family. They will be impressed by your skills.
Remember, patience and practice are key. Enjoy the process and have fun drawing. Happy sketching!